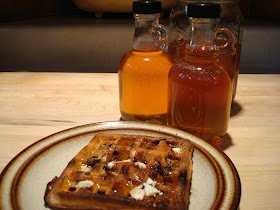
 One and a half quarts of maple syrup made from eight 2 gallon buckets of sap, collected over a period of three days and twelve hours of boiling. Is it worth it, you might ask. That depends...to me there's something magical about sugaring. Maybe its the promise of the coming spring, or the miracle of the running sap when all the landscape is still frozen. The drip drip sound of sap hitting the buckets and the snail-pace of the boiling process ground me somehow, connecting me to the land and the trees. If you have one or two maple trees in your yard, give sugaring a try. Your reward will be golden, delicious maple syrup, nectar of the gods.
Here are some simple steps for successful backyard sugaring.
First identify your trees. This is usually easier in the fall, when you can look at the leaves and see their colors, mark the trees and wait for the sap to run. Here in my corner of southern New Hampshire, sap rises in late February when day time temperature is above freezing and night temperature below freezing.
 Use a 7/16" drill bit to drill 1 - 1 1/2" tap hole into a mature and healthy sugar maple. Locate the hole directly below the largest, healthiest limb, on the south, southeast or southwest side of the trunk.
 This is a standard metal sap spout you can buy at the local hardware store, if you live in sugaring country like I do, or you can mail order them from Bascom Maple Farms.
Almost immediately the sap, clear as spring water, will spurt out and drip even before you can get the spout in.
These are used aluminum sap buckets, available from Bascom's for a mere $3.50. They're available used because big syrup producers no longer use buckets, they use tubing to deliver sap to a big holding tank at the bottom 0f the hill.
I start the boiling process outdoors, over a gas burner. The long process boils 40 gallons of sap down to 1 gallon of syrup. I fill a large shallow roasting pan with sap that I've strained through a sieve, lined with several layers of cheese cloth, to filter out the big pieces of debris--chunks of wood bark, dead moths, ants, etc. Turn the heat on full blast and boil at full steam, add more sap as the level goes down, skim away the foam and scum that form on the surface, continue evaporating until all collected sap is used up. When the sap in the pan turns amber with concentrated sugar and the temperature begins to rise above the boiling point of water, 212 degrees F, I move to the kitchen for better control.
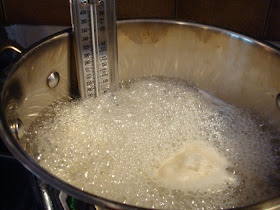
 I strain the liquid , slightly thick at this point, through a dampened felt filter bag, into a large, deep stock pot and clip on a candy thermometer. This is the critical stage that can make or break the final product. The pot can boil over in an instant, going from syrup to burnt at lightning speed. I watch like a hawk. When the temperature reaches 7 degrees above the boiling point of water (219 degrees F), it is syrup. I must admit though, I don't fret too much about all this. I try to get it as close to 220 degrees as possible but, frankly, after 12 hours of boiling, I settle for less than perfect. If my syrup is too thick or too thin my family will never complain, they're lost in the pure pleasure of fresh maple syrup on their waffles and crepes.
To can syrup for longer shelf life, pour hot syrup, at least 180 degrees F, into sterilized jars, cap and let cool in the jars, after which they can be safely stored in the pantry. Having said all that, I still store my jars in the freezer, just in case. Last year I made 9 quarts, and didn't want to risk losing them.
Try making your own syrup at least once, you'll never complain about the cost of pure maple syrup again.
 Warm on sourdough waffles and sweet butter. Sublime!
Maple syrup links:
Homemade Maple Syrup
Maple Syrup Facts
Sugaring at Middlebrook Farm School


Hey Ting, It looks like everyone has the maple syrup bug. Check out my farm blog to see what we have been doing with the sap.
ReplyDeletehttp://www.middlebrook-farm-school.blogspot.com/
I hope all is well up there. Say hello to Eric for me. -=W=-
Hey W, very cool that you're passing on the tradition to the kids. Wish I could've been there. Love your pictures too.
ReplyDeletehi ting! great to see you guys and love the pics of eric and the trees. you are both very cool:)
ReplyDeleteand hope we can have that creative weekend sometime in the spring...
xoj
yes we must, Bon Voyage!
ReplyDeleteIt has been a good support, appreciate it, now to make maple syrup is simple with your assistance. Kudos
ReplyDeleteThanks! I'm glad the info was helpful.
ReplyDelete